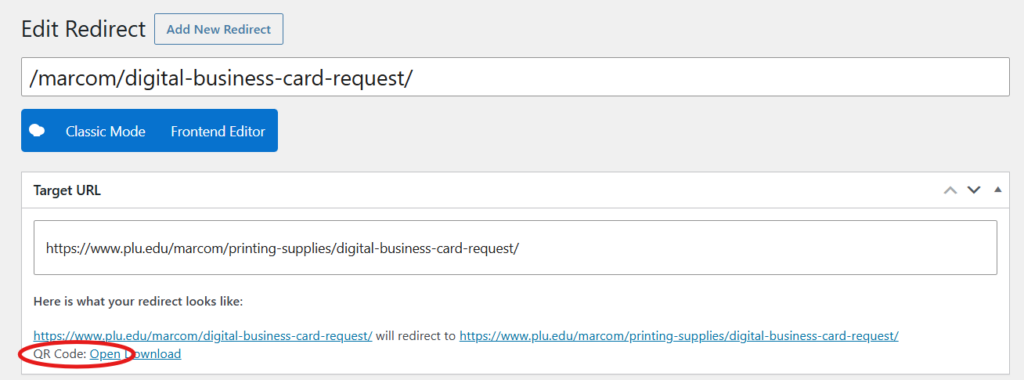

Note: Creating a redirect is also the way to create a QR code in WordPress.
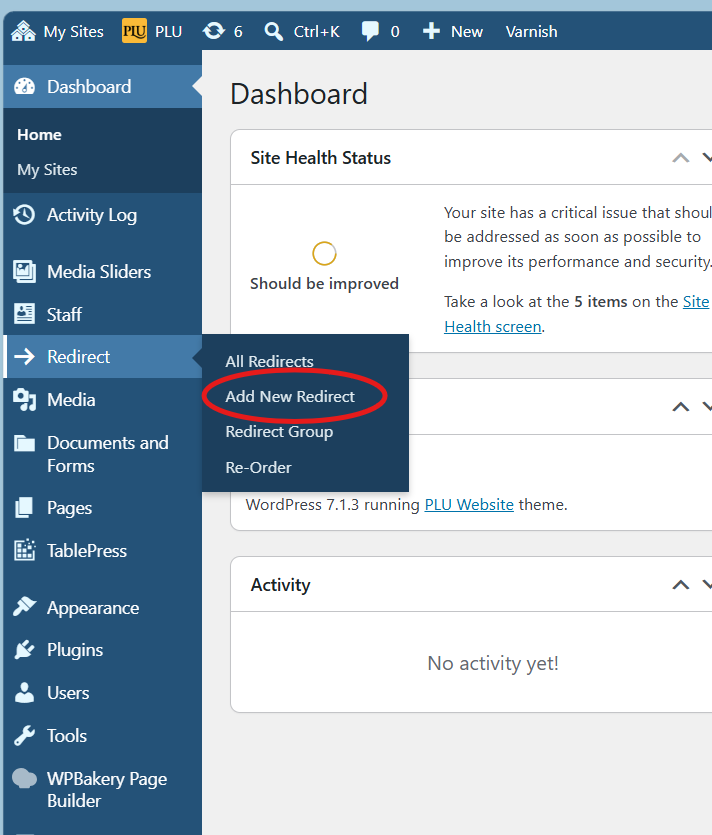
After logging into your site on WordPress, go to “Redirect” on the left menu. Then to “Add New Redirect”.
You can think of the Redirect Source Path as a shortcut that you want people to be able to remember. But the Target URL is the long, ugly, hard-to-remember URL where people actually need to get to. www.plu.edu/lectures is easier to remember than www.plu.edu/alumni-student-connections/learning-benefits/lectures/ but with a redirect, the easier to remember URL will get you there.
“Edit redirect source path” should be the URL that people start with. Your Redirect should start with your website title. For example, /marcom/survey or [/department-url-title/redirect-title].
In the “Redirect Group” (right side) create a group called “QR Code” and check the box. This may need to be created if it has not already by typing in the name and clicking “+Add New Redirect Group Type”. It will help in organizing the redirects you create.
You can also put in a timeframe you would like this in place. It does not expire but gives a reminder about if it is needed any longer. There is also an area you can put notes in about the Redirect.
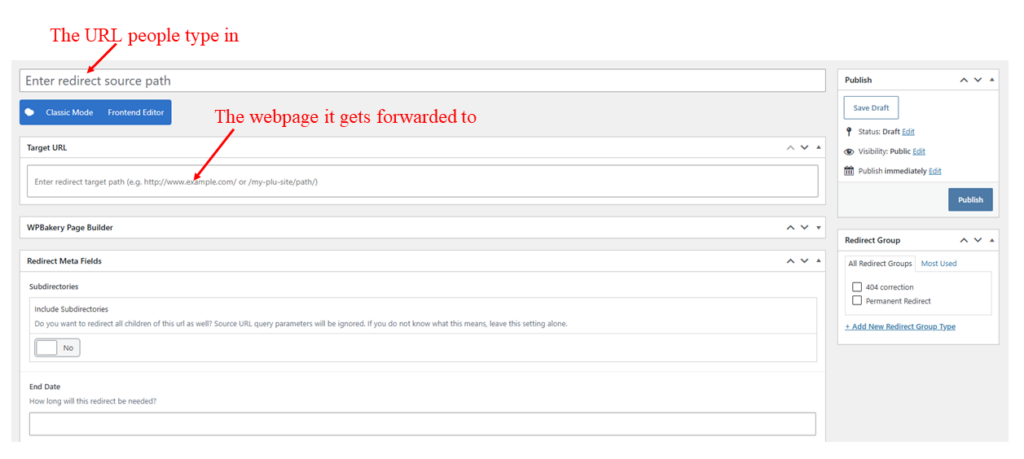
Add your “Target URL”. This is where you put in the URL you intend the redirect to go to. This area can be changed without changing the redirect or QR code.
Once this is complete publish the redirect. A QR code will be generated to download below the “target” URL area (at the bottom of the page). Click “Open” next to QR Code to view the codes. They will open in a new page. From that page, you can download the QR you prefer.