Concept3D is the platform we use for our campus map. If you ever see anything that needs to be changed, please email Julie Winters at winterjl@plu.edu.
How to generate a map you can print out.
One of the most frequent questions we receive is how to print the map. Since Marcom design isn’t creating any new maps for print, how can we use Concept3D to design one?
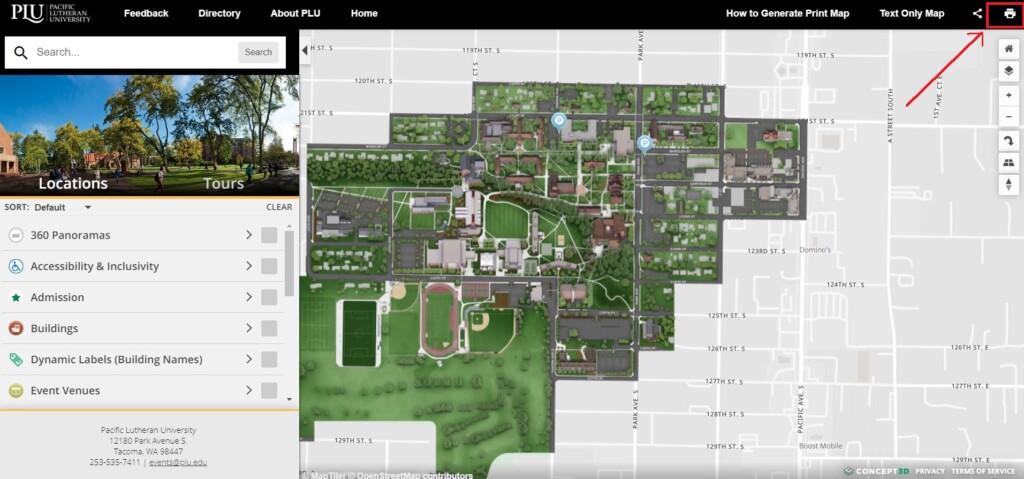
Click on the printer icon in the upper right hand corner. In the dropdown, click on Generate Print Map.

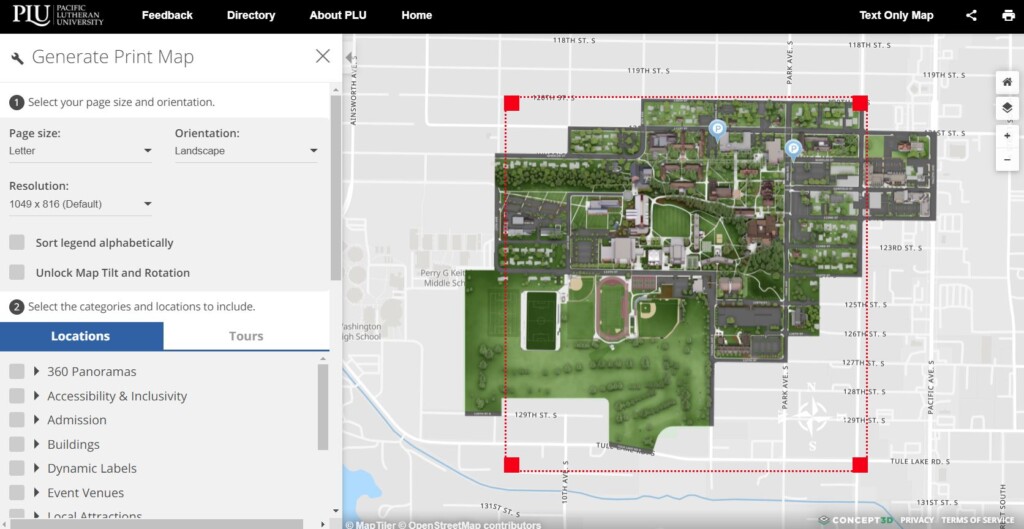
You will see a bunch of options on the left and a red box over the map.

Select the Page Size, Orientation, and Resolution.
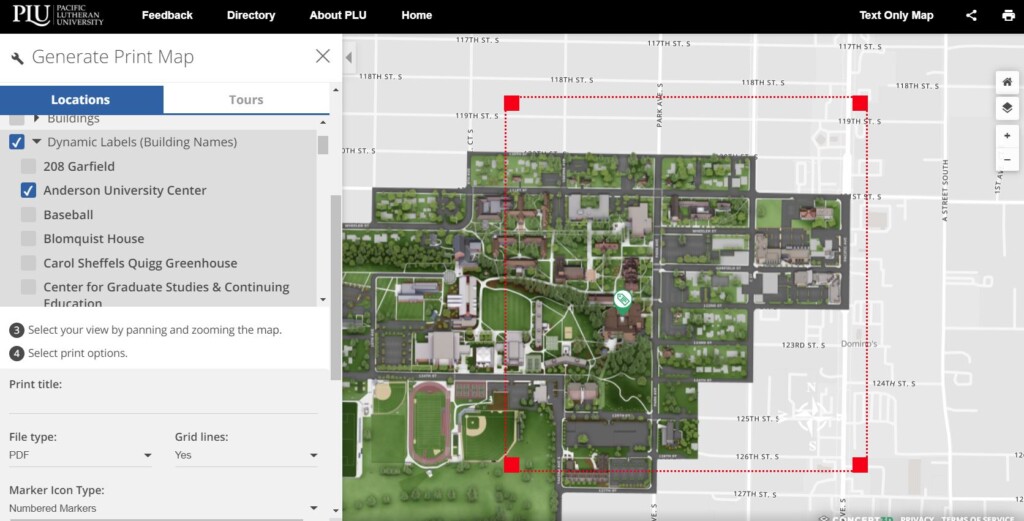
Next check the box/boxes of the categories or locations you want to include on the map.
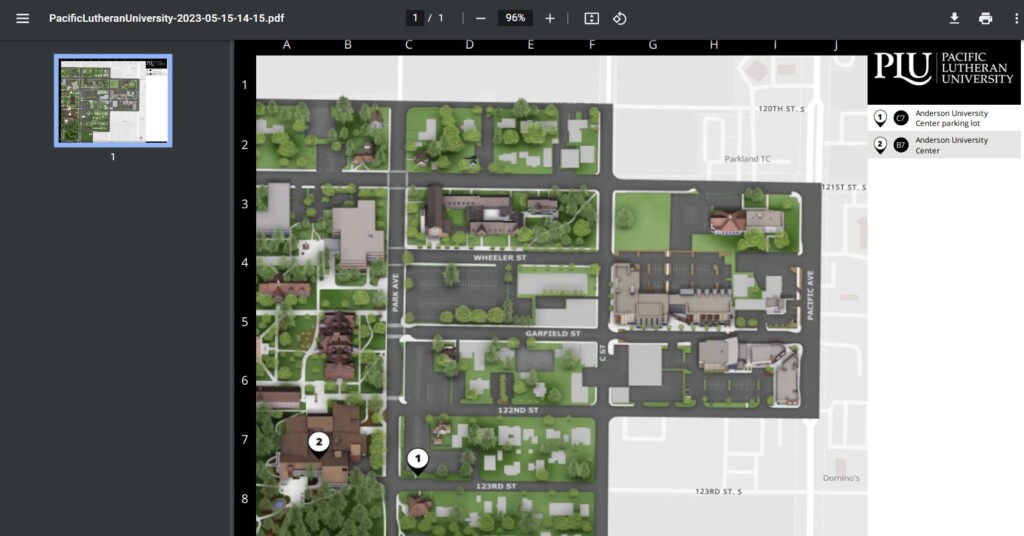
For example, let’s say there is an event in Anderson University Center. Check off the box in front of AUC and AUC parking, then move the map around within the red box. You can zoom in or out also. In the example below, I wanted to include the building, parking, and Pacific Avenue.

Give your map a Print Title and check what file type you want to use.
Check Yes or No for a lettered and numbered grid to match locations.
There are some other options toward the bottom.
Once you are happy, click the Generate Print Map button and it will take up to 30 seconds for a map to build and download to your computer.


